Blog
Design Ideas for a Nursery Remodel
When you’re about to have a baby, so many things are going through your mind. Your worries likely include how the new child is going to fit into your family and literally into your home. Remodeling or redecorating a new room for your baby-to-be is usually at the top of your baby preparation list. Moss Building and Design has all the remodeling tips you need to get started on this fun nursery project!
Put Painting at the Top of Your List
Decorating with new paint colors is the quickest and easiest way to update your room. Most parents pick serene, light palette colors like baby blue, light pink, yellow, or green for the walls, while light gray is also a very popular, modern choice. Painting should be done early in your process as you’ll want the room to be properly ventilated before baby’s arrival. Wall decals are also a great way to add personal touches to the room without having to get out the hammer and nails.
Create a Sitting Area in your New Nursery
One thing you’re going to be doing lot of in the nursery is sitting and rocking. Create a relaxed corner with a comfortable chair, side table near a power outlet for plugging in phone chargers, and floating shelves to store books or other knick-knacks. Add a plush rug for a cozy feel and keep must-have items, like burp-cloths, diapers, and blankets stored nearby in baskets or bins.
If you’re remodeling, consider an upgrade in overhead lighting. Directional ceiling lights will point brightness exactly where you need it, while dimmable switches allow you to choose the lighting level you need whether you’re up all day or all night.

Nursery Built-Ins are Safe Alternatives to Furniture
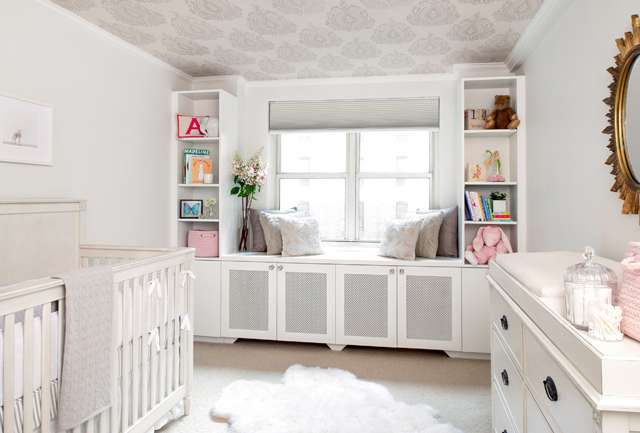
Nearly all furniture will need to eventually be anchored to the walls in your child’s room. As your baby becomes mobile, you want to avoid any toppling situation related to pulling or climbing on the furniture. Remodeling your room to include built-ins is a great way to permanently enhance the look of your room and completely remove that toppling risk. You should also consider renovating a closet for more organized storage solutions. A built-in bench seat would be a wonderful addition to your nursery sitting area as well as a perfect place for storing things, like extra diapers, out of sight. It will continue to be appealing for your older child or teenager’s reading, relaxing, and storage needs.
Built-in shelving and cabinetry is another necessity. You’ll undoubtedly receive a lot of baby gifts, stuffed toys, and books. Keep your favorite items out on display and store the rest. Design the shelving in the room with a mix of lower-to-the-ground shelves for your small child to have easy access to board books and higher shelves for more fragile items. Adding labeled storage bins to the shelves for easy organizing will keep things neat from the start.
Northern Virginia’s Best Remodeling Company
If designing a nursery or child’s room is on your horizon, contact Moss Building and Design to help. Our designers will work with you to create visualizations of your room before remodeling begins and our team of project managers will work to keep the remodel the least disruptive as possible. The team has long-established processes in place to keep you and your family safe and works to accommodate your needs if you already have small children or pets in the home. Contact us today!
Get a jump start on your remodel by signing up for Moss’ Design Days of Summer. Receive a FREE in-home Project Development Consultation and a design session with one of our expert Designers in our Design Center.
How to Plan For and Live Through a Remodel with Young Children
Does the thought of starting a home remodel fill you with equal parts excitement and dread? If you have young children and you’re considering a home remodel, those feelings might be tilted more towards stress and fear versus positive anticipation.
Northern VA Home Remodeling
Don’t worry, I understand. I, myself, was very nervous beginning the process of my Moss Building & Design home remodel back in 2010. At the time, my two boys were 3.5 and 1.5, and we wanted to remodel, essentially, our kitchen, dining room, and living room. Living in a split foyer, that meant that our bedrooms were on the same level as those areas. How in the world would we manage the process, disruption, and, what I perceived as insanity, involved with a home remodel? Would the boys be able to nap? Would I feel trapped in my own home? Let’s go through my process of how we lived through a home remodel and came out on the other side just fine!


All the decisions. All the people in and out. I. Can’t. Even.
Yes. You. Can. I approached our home remodel as I would have any project at work. I made lists, I prioritized, I researched, and I went out and made decisions. Sure, it wasn’t easy having to tote kids along, but I tried to make everything as fun as possible. I loved having the purpose of having to make design decisions and feeling like I could control every aspect of the remodel (within reason, of course!). Empower yourself and know that you can do whatever you need to do to get things done.
We won’t be able to survive without a full kitchen!
Not true! The experts at MOSS moved our old fridge to our basement, and between that, a toaster oven, a crockpot, and a good deal of microwaveable meals, we were just fine. Granted, my boys were small then, so their food intake levels were not what they are currently like in 2019. But, it wasn’t really that much trouble to shift how and what and where we ate during the 8 weeks of the remodel.
How can my child(ren) nap with all the noise and banging?
Surprisingly, our boys adapted easily to napping downstairs in a spare room in a pack & play. I used all the mom tricks: dark room, noise machine, soothing downtime routine, etc. In the end, no one missed a nap nor was the wiser for it.
It will take forever. We will never see “normal” again.
It won’t take forever. It can’t. The contractors have other jobs that they will need to get to eventually! The remodel time frame is an adventure – some days are easier to manage than others. But the final result will be worth it. It was worth it in our case. Our new kitchen/dining room were a better use of space, made our house much more updated, and helped us with our home sale a few years later.
As far as keeping the boys entertained, I did my best to come up with new and fun ways to make the afternoons fun in the basement (if we were stuck inside). Clearly I just let the finger painting get out of hand!
What about Fido and Kitty?
I didn’t have to worry about pets during our remodel (our cats steered clear of the situation!) but I can tell you that MOSS is very thorough and careful about your pets during any remodel. Prior to anything starting on your home, you will have a meeting with your project manager to go over all of these details. We are committed to making the remodel as non-disruptive as possible.
In the end, it was all very much worth it. MOSS is committed to helping families receive the remodel of their dreams. Because of our long history in the Northern Virginia area and our commitment to our customers, we are able to anticipate every question and need that comes along. Trust me when I say that knowing we were being taken care of by MOSS made the remodel painless and exciting. You will find that’s true too.
Get a jumpstart on your remodel by signing up for Moss’ Design Days of Summer. Receive a FREE in-home Project Development Consultation, and a design session with one of our expert Designers in our Design Center.
Ways To Deal With Not Having Enough Closet Space
By: Janice McLaury
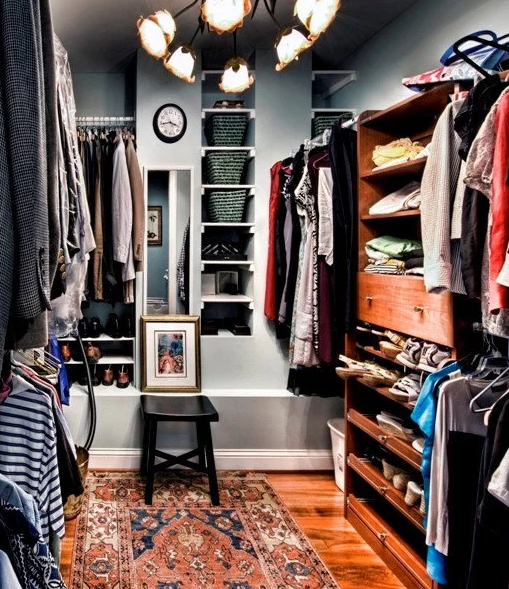
April is the ideal month to organize your closets. Since you no longer need layers of warm, cozy clothes and will be storing your winter wardrobes, you may discover new space in your closets. But, is there ever enough real estate in our closets for everything we want to be at our fingertips? Here are a few storage and closet organization tips to help all of us deal with not having enough closet space.
Clean Before Storing
Prepare your winter wardrobe before packing it away. This will prevent stains from setting in. With the change in season, now is the time to dry clean items that cannot be washed with everything else. This preserves your clothes and makes you ready for the next closet transition in the fall.
Store everything in breathable bags and boxes. Plastic is not ventilated and can break down fabric or contribute to mold if not kept in a clean, dry place. Once winter apparels are all set for storage, slide them under the bed, store them high in a guest room or hall closet, or stack them in another well-ventilated area.


Best Closet Organization Tips for Spring and Summer
Home organizer Amy Slenker-Smith from Simply Enough is judicious about her closet organization.
“With each season change, I donate the items I didn’t wear. As a result, I LOVE my entire close. Simplified wardrobes make getting ready easier because the clothing I wear most often is not buried under the stuff that I don’t,” Slenker-Smith says.
She also suggests:
- Choose certain colors that complement your skin tone, eliminate additional clothes you don’t feel good in, and reduce the number of accessories like jewelry, shoes, scarves, and purses to your favorites. Loving your wardrobe is an important way to manage clutter.
- Use one hanger style to maintain a cohesive, clean look and hang like-colored items together. This will make it easy to find coordinated outfits.
- Roll casual clothing in drawers or containers to maximize closet storage and prevent wrinkles.
Organizing Shoes Using Hanging Racks
Who doesn’t love accessorizing with shoes, boots, sandals, or heels? But, how do we keep them off the floor and top-of-mind when completing an outfit? For me, I keep shoes on cabinet shelves in the mudroom or in cotton, hanging shoe racks in the hall closet with my coats and jackets. Since the soles of our shoes are dirty, I like storing them with other outwear instead of with my clean, fresh-smelling clothes. This closet hack keeps them organized and easy to find when I leave the house. Shoes are also the first thing I take off when I arrive home, so having my outwear closet to put them immediately away in reduces clutter.
Regardless of where you store shoes, here are a few clever closet organization tips:
- Hang boots on the clips of a metal coat hanger designed for pants or stuff them with foam swim noodles to help keep their shape.
- Store your dress heels in boxes with a photo or description for easy identification, and place them on a higher shelf for minimally used items.
- Align shoes on a shelf or rack so that the left toe and right heel are facing outward, to maximize space.
Wardrobe Hacks to Stylishly Organize Closets
Even in smaller closets, you can have customized built-in organization without engulfing essential square-footage. Here are a few space-saving closet hacks:
- Install pull-out pant racks, valet poles to hang to daily outfits, and jewelry drawers to streamline closet organization.
- Neatly store workout clothes, socks, or summer casuals in roll out carts under hanging clothes to avoid having empty space that encourages clutter.
- Add additional closet lighting or a full-length mirror to make the space feel more welcoming and more practical for dressing.
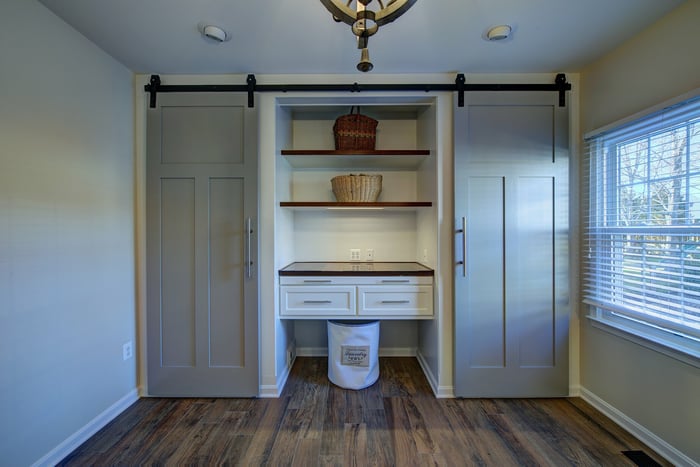
- Replace pull-out doors with sliding closet doors to create more room in small areas.
Moss Building & Design Can Help You Keep Organized
Are you in search of additional closet space or storage solutions for your home, office, or garage? Turn to us for remodeling ideas. Check out Moss Building & Design’s portfolio of additional possibilities for your attic, garage, basement, hidden nooks or additions.
[/vc_column_text][/vc_column][/vc_row]
Paint Color Design Inspiration for Spring
By: Julia Kilberg
Spring is upon us, as if your allergies didn’t already give that away. Along with the warmer air comes seasonal favorites like baseball, little league games, and even spring organizing and cleaning tasks. Like many homeowners, you may be considering refreshing your home with a remodel, new paint colors, or both! What is better than a pop of color to give you the feeling of a bright, new start? We’ve rounded up our favorite paint color suggestions to go with any spring renovation you may be planning.
Pantone Spring Paint Colors
In January, Pantone announced Living Coral as the color of the year. This vibrant color goes well with their spring/summer 2019 paint color selections that continue to evoke nature’s beauty. Pantone suggests pairing deep blues with light greens or going fully botanical with an array of oranges, pinks, and purples.
Lighter colors are often appealing for small rooms — like bathrooms or laundry rooms — that might need a little pick-me-up, while blues and greens can work well in living rooms and kitchens. If you don’t want to fully commit to any of these colors on the walls, look out for accent throws and pillows in these shades at places like HomeGoods since they’re sure to be on sale this season.
Painting Bedrooms and Bathrooms
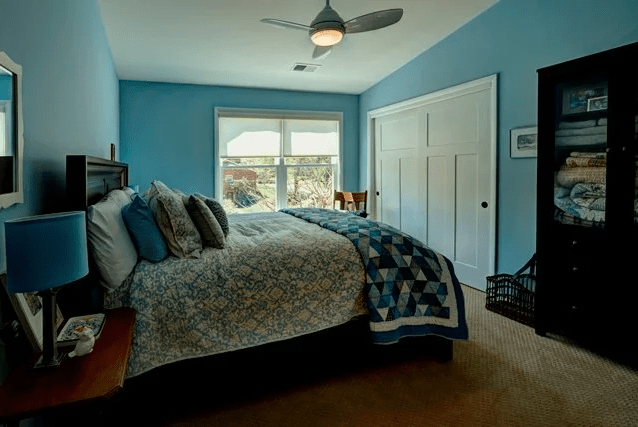
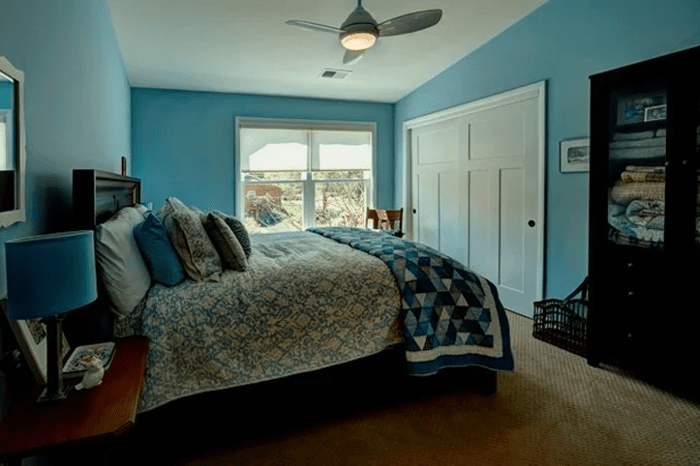
A bedroom doesn’t have to be a boring, neutral color. You can really infuse personality into the master bedroom you’re remodeling or redecorating by choosing dark wine colors, bright blues, yellows, or purples. If you choose a deep color, consider painting one accent wall instead of the entire room in order to prevent the room from feeling too dark.
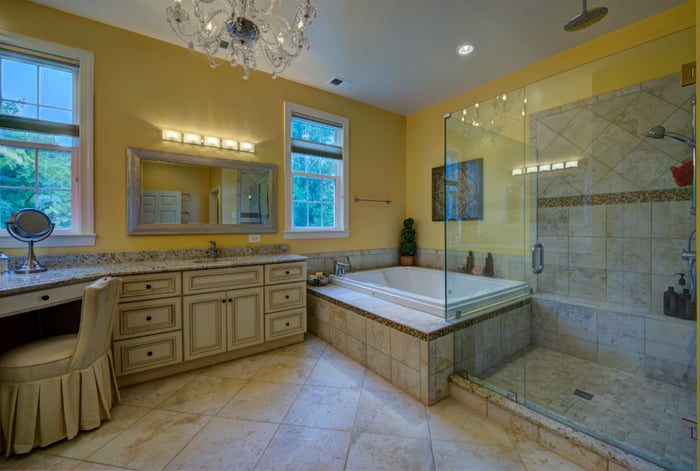
Bathrooms are ripe for color experimentation. The color you choose can also set the mood from light and refreshing to cool and relaxing. If I were going for a spa look, I’d choose more neutral gray or sand colors; while bright purples, peaches, or yellow colors evoke a feeling of cheer. Sherwin-Williams even has a yellow paint color named Springtime that serves as wonderful design inspiration for your spring/summer look.
Kitchen Spring Color Inspiration
The kitchen is a great place to freshen up your home’s look for spring. It’s an area that gets so much regular use and is often one of the first places seen by guests. If you’re going bright and bold with a floral color like red, pink, or yellow, an accent wall could help really inspire your design. Connect it to the rest of the room with a few matching bowls, dishtowels, or a vase.
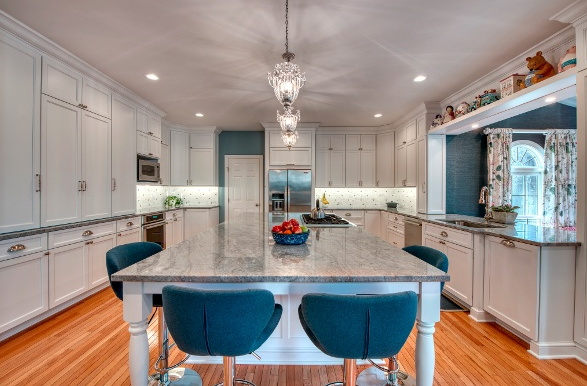
During many kitchen remodels, backsplash tile is where homeowners find the most opportunity to infuse color. In this Oakton, Virginia remodel, hints of blue in the backsplash tile complement the blue color on a small wall next to the refrigerator. The blue color also carries over into the adjacent dining room. Modern, blue barstools and a blue fruit bowl complete the look, making the color choices look intentional and harmonious.
Don’t get caught going with the trendy gray look completely. This Arlington, Virginia, remodel really committed to bright red. While bold colors may not be for everyone, it surely makes a statement when you let your personality shine through color choices and selections.
Best Northern Virginia Remodelers
If you are looking for a partner in designing your new kitchen, basement, bathroom, or addition, call us at (703) 961-7707 or email us at Hello@MossBuildingandDesign.com. We look forward to discussing your next project with you.
Interior Design Inspiration for Gathering Spaces in Your Home
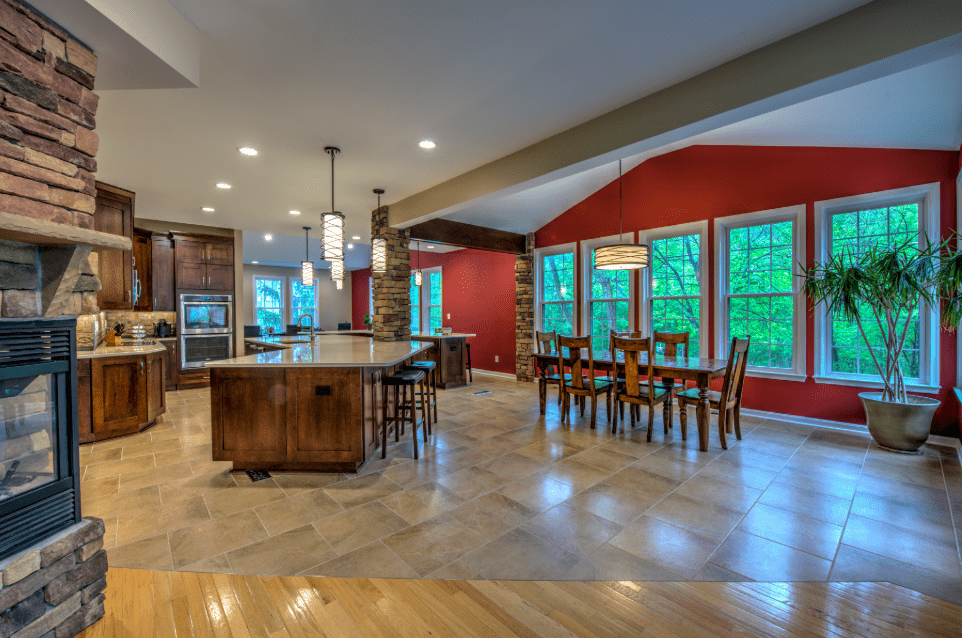
Many of us have traded our large, formal dining rooms for open floor plans — giving us more options to gather together to share delicious food, laughter, and interesting conversation in the home.
Today’s modern interior design trends, while appealing to the minimalist approach, also provide an array of spaces to entertain. This could be cooking and eating in the kitchen, playing games with friends and family in the basement, getting cozy on a sun porch or outdoor patio, or watching the latest movie on the big screen in the comfort of your own living room.
Creating ideal gathering spaces in the home is a concept that will continue to flourish. Read on to discover some interior design inspiration for four areas of your home that can truly become ideal gathering spaces for your family.
Gathering Together in the Kitchen
No matter how big or small, open or closed-off our kitchens are, they still feel crowded when entertaining. Most everyone wants to be where the action is — in the kitchen. The aroma of fresh food being prepared is enticing, as is the luring energy created by those eager to eat, drink, and be merry.
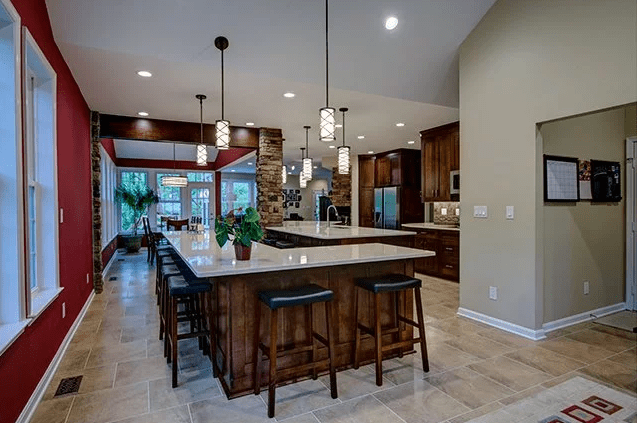
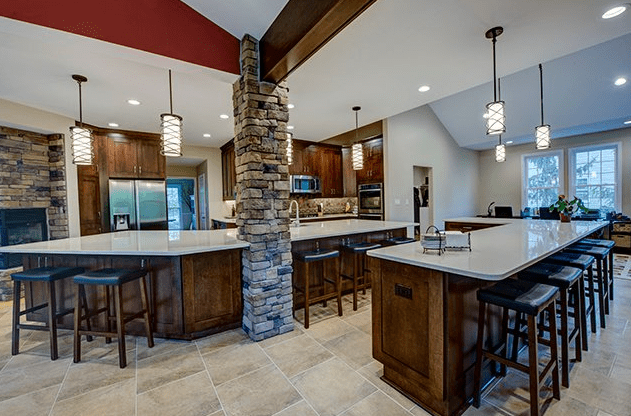
During our everyday routine, my family frequently gathers around the kitchen island, sipping morning coffee and talking about our plans for the day. At night, we crowd around the stove preparing grandma’s special gravy for dinner and rehash, play-by-play, the events from the day. Make sure your kitchen has an island big enough to accommodate your typical daily routines, but also leaves enough space for easily moving between the cabinets and countertops. The National Kitchen and Bath Association says that at least 36 inches should be provided for walkways between counters and an island; if the counter contains a work area or appliance, that should be increased to 42–48 inches.
What makes the so kitchen special is that it appeals to all the senses. We’re intrigued by the smell of what’s simmering on the stove, and rejuvenated by the overhead kitchen lighting that sets a bright start to our day. Lighting choices can really improve the feel of your kitchen. Natural light can fill the kitchen so comfortably that we never want to leave it. Smaller, task-oriented lighting — such as under-cabinet lighting — can help make food prep more precise.
Kitchens, just like bathrooms, often feature colorful, eye-catching tile and meaningful decorations. This is where you can let your personality and interior design style really shine as well.
Remodeling Ideas to Gather in the Basement
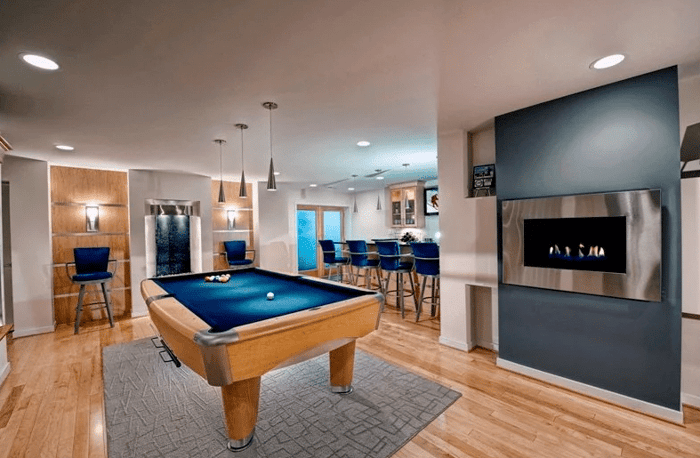
Recent Northern Virginia home remodels show that families are increasingly becoming more interested in gathering spaces for children, friends, and mixed-age company to socialize. This has sparked interest in building game rooms, media centers (home theaters), home gyms, and smaller kitchenettes or bars in the basement. The new trend is “staying in.”
When renovating your basement to turn it into a socializing headquarters, remember these key remodeling tips:
- Create multiple seating groups, like conversation areas, which could include trendy, oversized ottomans
- Maintain enough room to walk around easily
- Install a food and beverage area
- Use flexible, recessed lighting on dimmable switches
- Ensure good air flow circulation for comfortable temperatures all year round
Gather Outdoors in New, Remodeled Areas
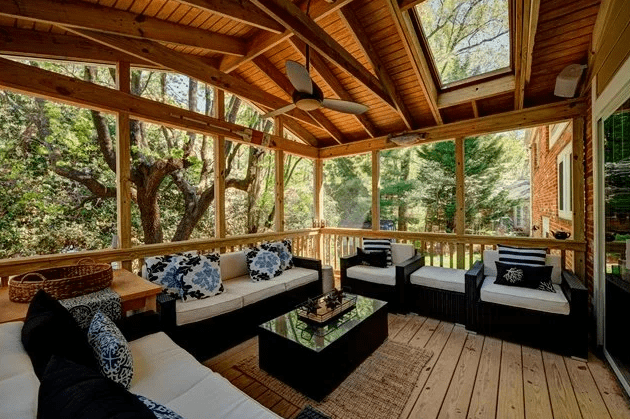
When the weather is beautiful, we tend to be drawn outside as much as possible. Whether your goal is to roast marshmallows over an open flame on an outdoor patio or relax by a fireplace inside a year-round sunroom, Moss Building & Design’s designers can help bring your outdoor oasis to fruition.
When designing an outdoor porch or addition, it is essential to consider:
- Where the sun rises and sets for lighting and temperature concerns
- How you want to mostly spend time in your outdoor space
- What side of your home provides the most privacy from noise and neighbors
- Whether full-length or shorter windows will drive your design
- Whether or not screens are required for insect protection

Gather Around the Big Screen
More and more families are looking for ways to transport the “big screen” experience home. A large-screen TV is a premium design feature in any new space, whether that’s a screened porch, patio, theater room, or a basement. If outdoors, make sure your electronic equipment is weatherproof.
When planning your seating arrangements for an indoor theater room, the general rule for viewing distance should be between 1.5–3 times the screen size. For example, a 52-inch HDTV should be viewed from 7–13 feet away.
Check out Moss Building & Design’s portfolio of endless possibilities for your basement, game room, media center, sun porch, living room, and kitchen.
Contact us at (703) 961-7707 or email us at hello@mossbuildinganddesign.com.
MOSS, in Spring, is all about Supporting Local Little Leagues
One of the ways that our MOSS Community Relations team enjoys giving back the most (especially during the beautiful spring weather!) is by supporting Northern Virginia Little League organizations. With so many children spending their evenings and weekends on the baseball diamond, how better to support teamwork, fresh air, and exercise than by supporting these ball players and the organizations that so tirelessly work to teach, mentor, and instill love of the game in them?
This spring, as in the past, MOSS has donated time, energy, and monetary support to local Little League organizations. It is our hope that the children involved will enjoy what being on a team is all about – we here at MOSS believe strongly in the power of teamwork, from start to finish, within our company and with each of our customers. Giving back to the community we work in only reinforces that each and everyone is a part of our team.
So if you happen to be out and about near any of these areas, stop by a baseball field and check out the teamwork and baseball in action. From T-Ball to Majors, MOSS wishes every player a successful and fun spring 2019 season!

MOSS Celebrates Take Your Child to Work Day
On April 25, the MOSS team celebrated National Take Your Child to Work Day with an afternoon full of events. In what we hope becomes an annual tradition, employees and their children spent the day exploring what life is like for many of the Moss Building and Design employees.
Children Experience What It’s Like to Be MOSS Employees
First, the kids and parents worked on assembling and painting bird houses and frames. Though not quite a day “in the field,” the hands-on activity was a greatly enjoyed building project.
Other activities included a tour of the warehouse and forklift demonstration, a design your dream bedroom station, mock interviews, a meeting with HR to receive a MOSS shirt and badge, a demonstration of MOSS 360 (Moss Building and Design’s augmented and virtual reality tool), as well as a community relations station to prepare after-school snack pack for a donation to Cornerstones.


Check out more photos from the event on our Moss Building & Design Facebook page.
Thank you to all employees who participated in showcasing their skills for the sons and daughters who attended.
A big thanks as well goes out to Jeannine Miller, pictured above with her daughter and a friend, for coordinating such a successful employee event. We hope to see these young minds and many more next year at Take Your Child to Work Day!
8 Packing Tips to Prepare for a Remodel
Remodels generate dust that can destroy belongings if the owner doesn’t take care. Before a major remodel takes place in your house, you may be required to pack up your belongings and put them somewhere safe. These tips about how to pack your home can help ensure your belongings will be in good condition when the remodel is over.
1. Take Time to Downsize
Think of packing for a home remodel as an opportunity to downsize and eliminate clutter in your home. Start packing months in advance to give yourself time to downsize. Get rid of those things that you haven’t used in a long time, or that won’t match the decor when the remodel is complete. The less stuff you have, the easier and cheaper it will be to store.
2. If Needed, Choose a Storage Facility Wisely
The storage facility you choose will have a big impact on the condition of your personal things when the home remodel is over. Not all storage facilities are created equal. Look for a business with a good reputation and solid policies in place to ensure your personal belongings will be protected.
- Get references or ask people you know for recommendations.
- Tour the facility and ask questions about their pest control measures.
- Find out when the facility is open for you to access your unit.
- Ask about security and how they keep units safe.
Get a climate-controlled facility if possible. Climate control reduces humidity, which is good for belongings like wooden furniture.
If you’re unable to get a climate-controlled facility, do not store items like electronics, makeup, mattresses, large appliances, and clothes in your unit. Without climate control, these items may be damaged by mold or heat.
3. Be Generous With Bubble Wrap
Wrap all fragile items in bubble wrap, including dishes, vases, and lamps. For slightly less fragile items, save money on packing products and use sheets, blankets, or pillows.
4. Know What Not to Pack
Not everything can be stored properly and safely — like perishable food, toxic chemicals, and most liquids. If you decide to use a storage facility, get a list of prohibited items before you start packing. If you’re remodeling your kitchen, be sure to use up as much of your food inventory as possible prior to the remodel.
You should also set aside items you may need to use regularly — like certain cooking utensils — to help save on storage space and keep your daily operations running smoothly. According to Amy Slenker-Smith, owner of Simply Enough, “I encourage clients to think through how they will live and function during the remodel. For kitchens, set up a temporary kitchen with only the essentials, away from the drywall dust. If it’s a bathroom or master bedroom remodel … declutter your clothes and toiletries to reduce storage needs.”
5. Disassemble Furniture Whenever Possible
Take apart furniture before placing it into storage. Disassembling furniture makes it easier to move and easier to store. Place all screws and nuts into a bag, then label it, and tape or attach the bag to the piece of furniture.
Not sure you’ll remember how to reassemble? Take a video of yourself as you take the piece apart. Use this video as a tutorial when it’s time to put things back together.
6. Label Things Properly
Label all boxes clearly with their contents. If the box contains something fragile, write FRAGILE on the outside. Label boxes on all sides and on top so you can tell what you’re looking at no matter which side is visible.
If you’re packing up more than one room worth of stuff, assign colored stickers to each room, then place the colored stickers on the boxes. This prevents you from having to write the names of the rooms where the boxes go over and over again.
7. Make an Inventory
Make an inventory of the most important items that you packed, so you’ll know what’s been placed into storage and what is still at the house. This will prevent you from losing items and will save time when you need to find one specific item.
8. Store Valuables in a Safe
Store valuables in a safe in your home or in a safe at your bank. If storing at home, buy a portable safe that is fireproof and lockable, then keep the key on your keychain. Keeping items locked up prevents confusion and gives you peace of mind.
Preparing and organizing for a remodel can be tough. Make it easier by taking advantage of our Home Organization Promotion today! Professional home organizer and owner of Simply Enough Amy Slenker-Smith is ready to help you pack up your space before a remodel, or reorganize and declutter after the home remodel is complete!